A fern that has filled its pot to the brim is actually a gift in disguise. Packed inside that dense root ball are the makings of two, three, or even four healthy new plants — all free, all ready to grow with minimal effort on your part.
Root division is the most straightforward way to multiply your fern collection. You don’t need grow lights, heat mats, or months of waiting. If you have a sharp knife, a clean pot, and a little patience for the recovery period, you have everything you need to turn one overgrown plant into several thriving ones.
What Is Root Division?
Root division is the practice of physically separating one plant into smaller sections, each with its own roots and foliage, and potting each section individually. Unlike growing from spores — which can take six months or more to produce a recognizable plant — root division gives you an established plant almost immediately.
Most common indoor ferns are excellent candidates for this method:
- Boston ferns (Nephrolepis exaltata): Develop dense, spreading root clumps that divide easily into halves or quarters.
- Holly ferns (Cyrtomium falcatum): Form neat crowns with clear natural separation points.
- Sword ferns: Produce multiple crowns in a single pot, making division very intuitive.
- Bird’s nest ferns: Can be divided, though they prefer to stay undisturbed longer than other varieties.
When Your Fern Is Ready to Divide
The best time to divide an indoor fern is in early spring, just as new growth is beginning. At this point, the plant is waking up from its slower winter period and has enough energy to establish new roots quickly.
That said, the more reliable signal is the plant itself, not the calendar. A fern that clearly needs dividing will show you in a few specific ways:
- New fronds are noticeably smaller than they were a year ago.
- The center of the plant looks sparse or has browned out entirely.
- Roots are circling the pot or pushing through drainage holes.
- The pot feels very heavy and solid even a few days after watering.
Tools You Need Before You Start
You won’t need much, but having everything ready before you start makes the process cleaner and less stressful for the plant. Gather these items first:
- A sharp, clean knife or garden shears: Dull tools tear roots rather than cutting them. Clean with rubbing alcohol before use to prevent spreading disease.
- Fresh potting mix: A well-draining blend with some organic matter — the same type you’d use for any indoor fern.
- New pots: One for each division. Each pot should be roughly a third larger than the root section going into it — not too big, not too small.
- A tarp or newspaper: To work on. Root division gets soil everywhere.
- A watering can: For thorough post-division watering.
The day before you plan to divide, water your fern generously. A well-hydrated plant handles the stress of division better than a dry one, and the roots will be more flexible and easier to work with.
How to Divide Your Fern Step by Step
Step 1: Remove the Plant from Its Pot
Tip the pot sideways and gently ease the plant out. If the roots are tightly packed, run a butter knife around the inside edge to loosen them. Work slowly to keep the root ball as intact as possible — no yanking.
Step 2: Loosen and Examine the Roots
Once the plant is out, gently shake away excess soil. You’re looking for natural separation points: areas where two or more distinct clumps of fronds emerge from separate sections of root. These are your natural division lines.
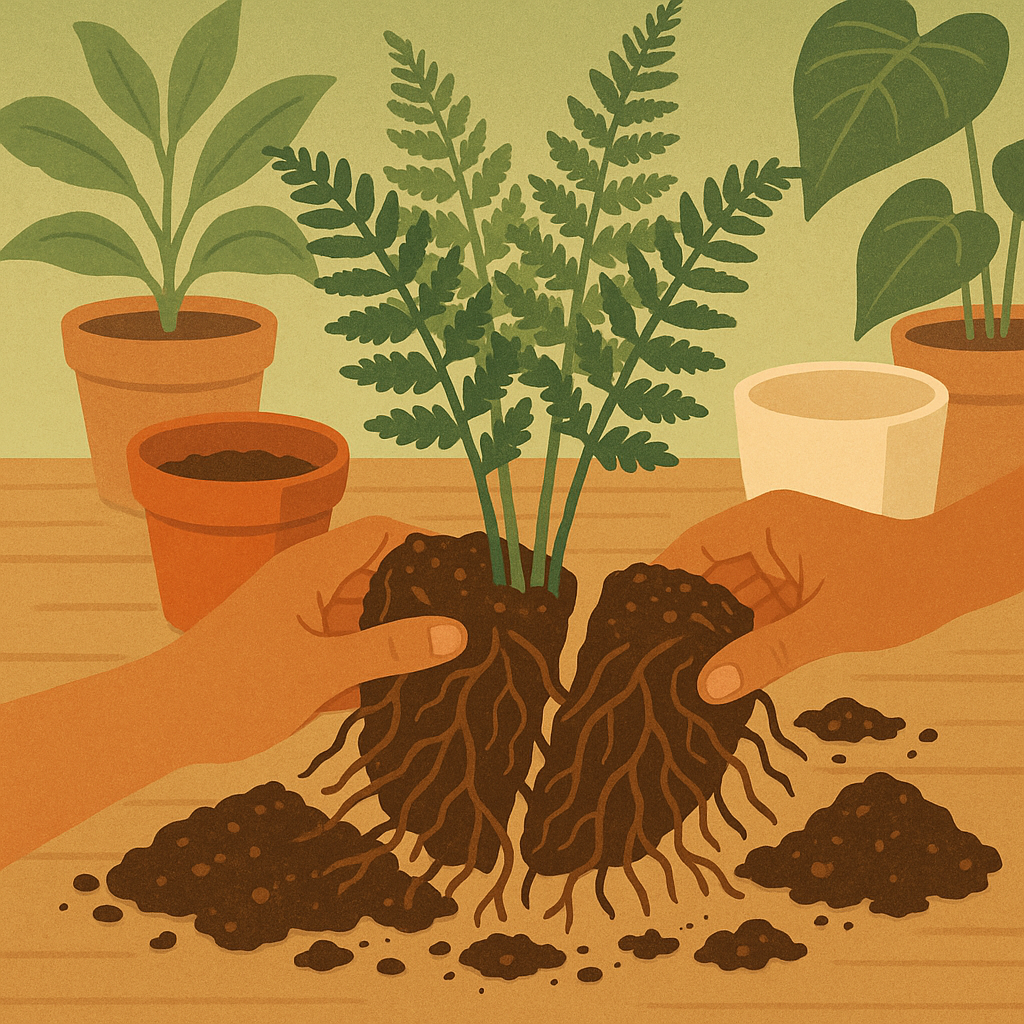
Step 3: Make the Cut
Position your knife between the natural clumps and cut firmly downward through the root ball. For a large fern, you can divide into halves or quarters. Each section must have a visible crown — where fronds emerge — and a healthy mass of roots attached.
Don’t worry about being too aggressive. Fern roots are tough, and a clean cut heals quickly. Do discard any sections that are fully brown, mushy, or rootless.
Step 4: Pot Each Division
Fill each new pot partway with fresh potting mix. Place the division inside, centering the crown at roughly the same depth it was in the original pot. Fill in around the roots, pressing gently to remove air pockets, and leave about an inch of space at the top for watering.
Step 5: Water and Position
Water each new pot thoroughly until water drains freely from the bottom. Then place each division in bright, indirect light — never direct sun, which would stress a freshly divided plant further. Expect some drooping or leaf browning in the first one to two weeks. This is normal transplant adjustment, not failure.
Pros and Cons of Fern Division
Free Plants, Fast
Division produces established plants in weeks, not months. One pot becomes several with no purchase required.
Revitalizes the Original Plant
Removing congested roots and refreshing the soil gives the parent plant a genuine second wind and encourages healthier new growth.
No Special Equipment Needed
A knife, some pots, and fresh soil is all it takes. No grow lights, heat mats, or humidity tents required.
Temporary Stress to the Plant
Division always causes some shock. Expect a rough-looking week or two while new roots establish in their fresh soil.
Not All Ferns Divide Well
Certain species — like bird’s nest ferns — prefer to grow undisturbed and may take longer to recover when divided frequently.
Frequently Asked Questions
How many sections can I divide a fern into?
For most indoor ferns, halves or quarters work best. Each section must have a healthy crown and roots. Dividing into too-small pieces risks sections that lack the energy to recover. When in doubt, cut into fewer, larger pieces — they’ll establish more reliably.
My fern looks terrible after dividing. Is it dying?
Not necessarily. Drooping fronds and some browning are normal for the first one to two weeks after division. As long as new fronds are emerging within three to four weeks, the plant is recovering well. Keep the soil consistently moist and out of direct sun during this window.
Can I divide my fern in summer or fall?
Spring is ideal, but early fall works in a pinch. Avoid high summer heat, which adds extra stress to an already vulnerable plant. Winter division is not recommended — ferns are growing slowly and have less energy to push new roots.
What if some roots are brown or mushy?
Trim them away cleanly before potting the division. Brown-but-firm roots are usually fine — they may simply be older tissue. Mushy or foul-smelling roots indicate rot and should be removed completely. As long as some healthy, white roots remain, the division has a very good chance of establishing.
Final Thoughts
Dividing your ferns is one of the most satisfying things you can do as a plant parent. There’s something genuinely rewarding about taking a crowded, slightly ragged pot and turning it into several fresh, thriving plants — all from the same root ball you’ve been tending over the years.
The process takes about thirty minutes, uses tools you likely already have, and produces results within weeks. More than just multiplication, division is an act of renewal for your original plant too — giving it the space, fresh soil, and energy to grow beautifully for another few years.
When the signs are there and the timing feels right, trust the process. Your ferns will thank you.